Showing posts with label candy. Show all posts

Monday, March 21, 2011

recipe: homemade marshmallows

Ever since I realized that it's within my power to make marshmallows, I, like a young god high on new-found might & processed sugar, have made a lot of marshmallows. I'm still experimenting with flavors but I've got the technique pretty well down, so I figured I'd share.

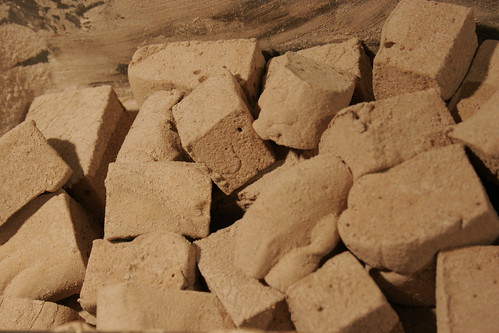
coffee mallows long


What follows is the base recipe. It's kinda long because a) I talk a lot and b) sugar is terrifying so I wanted to explain myself superextra clearly. To minimize v-scroll here, I'll do a followup post in a couple days with some notes on flavorings.
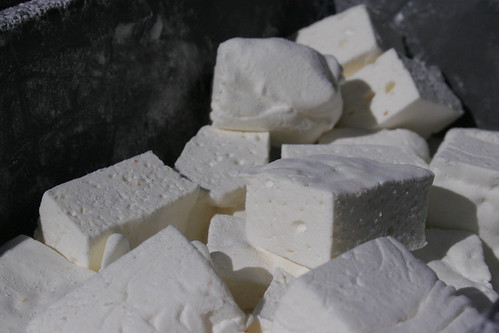
clementine mallows


homemade cocoa marshmallows


Homemade Marshmallows
Adapted from Alton Brown. You can watch the 'Puff the Magic Mallow' episode of Good Eats to see the general process, but I actually don't recommend following all of his instructions from that episode.
Makes ~24 1.5-inch marshmallows or ~32 1-inch marshmallows


INGREDIENTS

1 package gelatin
1/6 cup cold water

1/2 cup granulated sugar
1/3 cup light corn syrup
1/6 cup water
Pinch salt

1/3 tsp vanilla extract

1/4 cup cornstarch
1/4 cup powdered sugar

~1/2 tbsp butter or oil or etc. for greasing


EQUIPMENT

Stand mixer with whisk attachment
2 spatulas (preferably 1 stiff one for scraping and 1 large & softer one for pressing)
Medium saucepan
Bread pan
Fine-mesh sieve (you can also use a tea strainer with patience)
1 ramekin/small bowl
1 small (~1-cup) container with lid
Candy or probe thermometer
Timer


PREP

Working with sugar is scary because it requires both speed and caution. I like to prepare all of my ingredients & equipment before I start so's I won't forget something and end up with no place to put boiling edible napalm. So.

Prep the gelatin: Empty 1 packet of gelatin into a small bowl or ramekin. Add 1/6 cup of cold water (you can go over by a couple teaspoons), stir, and set aside to bloom (i.e., absorb the water and soften).

Prep the sugar: Add your sugar, corn syrup, salt, and 1/6 cup of water to a medium saucepan. You don't even need to stir it. Set aside.

Prep the powder coating: Measure your cornstarch and powdered sugar into a small bowl or resealable container. Stir to combine but don't worry about it being lumpy -- you'll be sifting it onto everything anyway. Set aside.

Prep the equipment: Grease everything. Grease the bowl of the mixer up to the rim. Grease the heads of 2 spatulas. Grease your bread pan up to the rim. If your cat likes to get all up in your fries while you're cooking, grease your cat. (It'll thank you later.) Use whatever fat and application method you like best -- I like peeling the paper back from the end of a stick of butter and rubbing it over the surface of the object to be greased, then using my fingers to apply the coat evenly and completely.

Okay.


METHOD

Set up your stand mixer so it's ready to go, and add the bloomed block of gelatin to the mixer bowl. Get out your candy or probe thermometer.

Next you're gonna cook the sugar mixture to the soft ball stage (240 degrees F/120 C). Place your saucepan full'o'sugarstuff over medium heat, swirling the pan occasionally to ensure even heating. (Because sugar likes being in a crystal state, you generally don't want to agitate sugar mixtures by stirring them -- if you stir, it'll be more likely for a rogue sugar crystal to become the nucleation center of crystallization and make the mixture go grainy. Corn syrup, being syrupy & therefore a stabilizer, helps prevent that, and that's why candy recipes call for it.) When the sugar starts to bubble, place your thermometer of choice in the pan and swirl the mixture continually until the sugar reaches 240 degrees F (120 C). Immediately take the pan off the heat. Turn your stand mixer on its lowest setting, and slowly (carefully, respectfully) pour the sugar syrup down the side of the mixer bowl towards the bottom. The goal here is to keep the syrup moving without risking it hitting the whisk and splattering you. That would be bad.

Once all/most of the syrup is in the mixer (a little syrup loss is totally acceptable), crank the mixer up through its settings until it's going full-tilt. Set a timer for 15 minutes.

While the mixer's doing its thang, prepare your bread pan: Put a tablespoon or two of your powder mixture in the fine-mesh sieve and tap a good, thick layer of powder into the bottom of the pan, and a finer coating up along the sides. Unlike buttering & flouring a pan for baking, you don't want to tap the edges of the pan to move the powder around -- it'll clump and stick. Just sift it in there and set the pan aside until the timer goes off.

When the timer goes off, peer into your mixer bowl and take note of the texture of the batter -- it'll be sticky and stringy as the whisk moves through it. Measure out your vanilla extract, turn the mixer speed down to low, and pour in the vanilla. Give it a few seconds to incorporate, then turn the mixer speed back up to high for ~1 minute, or until the 'mallow batter reaches about the same stringy consistency that it had before you added the vanilla.

Time to get the marshmallow batter into the pan. You'll have to work very quickly because the batter will become stiff and difficult to remove from the mixer's bowl in less than a minute. Put your greased spatulas within reach and turn off the mixer. Clean off the mixer's whisk first, using one spatula to gather batter and the second to scrape the batter off the first spatula and into the mixing bowl (or straight into the waiting bread pan, whichever's easier depending on your mixer setup). Using the same gather/scrape method, firmly scrape the rest of the batter out of the mixing bowl and into the pan. You can just kinda glop it in there -- the important thing is getting as much as possible out of the bowl before it sets.

Once you've got all the batter you're gonna get in the pan, use your spatulas to press the batter down into the pan evenly, pushing it into the corners and flattening it out. You should still be working kinda quickly, but this part is much more forgiving. Don't be afraid to press down pretty firmly. If any unaesthetic ridges or stringy trails form along the surface, just run your hands under the faucet, flick off the excess water, and gently smooth the batter out with your damp fingertips.

When you're satisfied with your 'mallow loaf, set the pan somewhere where it won't be disturbed for ~4 hours (or up to overnight). You can tent it very loosely with tin foil or a paper towel if you're afraid of things (dust, kids, dogs, etc.) getting into it, but you really want the loaf to be able to breathe and dry out, so don't cover it completely.

(Cleaning up after this step won't be as terrifying as it seems 'cause marshmallow goo, while tough to wrangle out of a bowl and into a pan, is easy to wash up. It's made entirely of things that dissolve in water. Yay science!)

Once the loaf has rested for 4+ hours, get out a cutting board and sift a good layer of your powder mix on its surface. Sift a layer of the powder on top of the 'mallow loaf, too, then turn the loaf out onto the cutting board. Cut the loaf into 3 or 4 strips lengthwise, dust the whole thing with more powder, and dip the cut edges of the strips into the powder on the board. Then push the strips back together into loaf form and cut the strips widthwise into squares (or rectangles, rhombuses, or other quadrilaterals; no one will care if the delicious homemade marshmallows you give them are kinda misshapen). Dust the whole thing with yet more powder.

Pull one of the marshmallows away from the rest, dip each cut side in the powder on the board, and then dust the excess powder off with your fingers, taking special care to make sure that there's no buildups of powder stuck in the marshmallow's crags and crevices (that would not be delicious, and can get gross and grainy if you let it sit).* Toss the finished marshmallow back into a large plastic bag (don't cramp your 'mallows). Repeat with each of the marshmallows.

*Boyfriend's hack for this step, which works nearly as well and takes like three seconds rather than 15 minutes: Pull a couple handfuls of well-powdered marshmallows apart from each other and toss them in a colander, then, over your sink, shake and toss the marshmallows to coat with powder.

You can store the marshmallows for up to a month in a sealed plastic bag or other airtight container -- they might get a bit stale around the edges after the first couple weeks, but will still be delicious, especially when roasted over fire/melted in cocoa.

Saturday, January 15, 2011

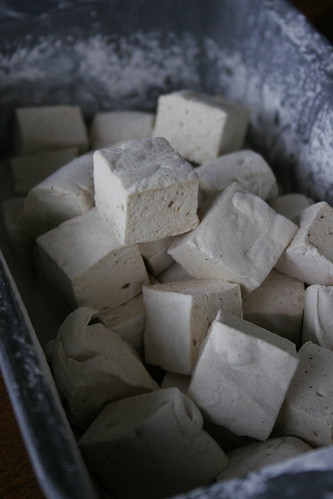
foodpr0n: homemade cocoa marshmallows

The first thing you learn when you make marshmallows from scratch is that Ghostbusters was lying to you. That is not how marshmallow goop behaves. (They used shaving cream.) Actual marshmallow goop is far more insidious, more inexorable, more sticky than the deceptively benign horrors that our comedic but intrepid heroes faced back in 1984.

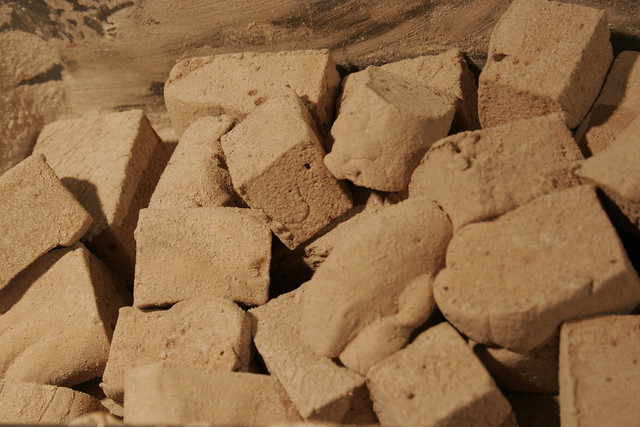
That said, the payoff of working with marshmallow goop is well worth the effort:

homemade cocoa marshmallows tumbled in a pan

I'd be posting a recipe right now, but at this point I'd just be plagiarizing Alton Brown's excellent instructions. I'll get back to you later, once I've had the chance to perfect a few wacky flavors.

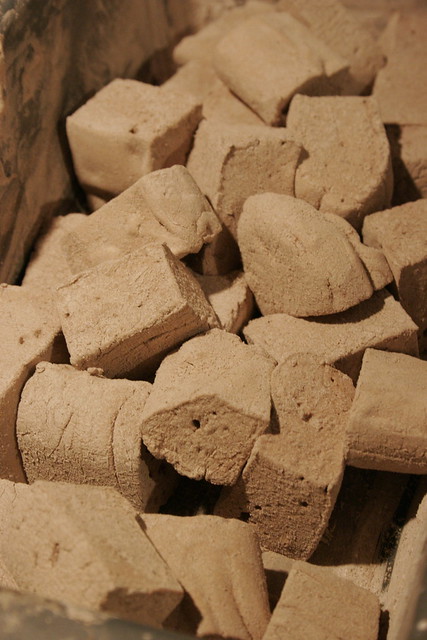
These cocoa marshmallows were made exactly according to Alton's recipe, except I only made 1/3rd of the recipe (which fit perfectly in a bread pan) and added 1 tablespoon of cocoa powder to the 'mallow batter in addition to the vanilla (having turned the beater speed down first and up again afterwards to prevent splatter), plus another 2 teaspoons of cocoa powder to the cornstarch/powdered sugar coating mixture.

more closeup detail of homemade cocoa marshmallows

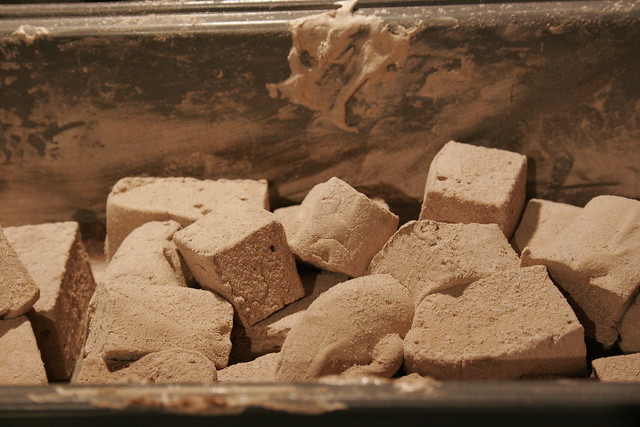
homemade cocoa marshmallows in a messy pan

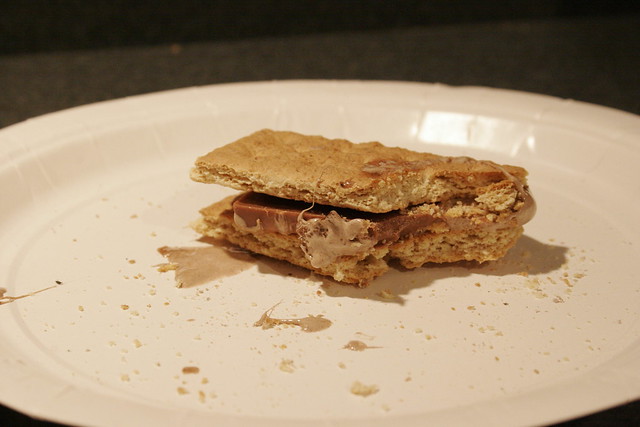
Of course, s'mores had to happen immediately.

a s'more made with a homemade cocoa marshmallow and Lindt milk chocolate

The only potential downside here is that now I want to make marshmallows in all the flavors. Like banana, and espresso, and Nutella, and whiskey, and caramel, and chai, and Earl Grey. It'll be the tastiest pain in the ass there ever has been.

Thursday, November 25, 2010

Thanksgiving can also have tricks and treats

Happy Thanksgiving, American compatriots! If you're looking for something to do with that extra bag of cranberries you accidentally bought, I recommend sugaring them for a pretty table setting/delicious cranberry candy 2-hit combo.

sugared cranberries on a table set for Thanksgiving dinner

My contribution to the dessert table this year will hypothetically be this Pear Butterscotch Pie from Epicurious. "Hypothetically" because it's in the oven right now, and it's looking a lot more like one of Mrs. Lovett's pies than the thing in Gourmet's picture, and we're out of tin foil so I can't tent the edges of the crust to prevent overbrowning. [Though really, if I manage to not set it on fire I'll be doing better than I have with Thanksgiving dishes in the past. (I apparently only bust out the en fuego accidental for special holiday occasions. It's the best hostess gift ever? It's thematically warm & stressful?)] Will let you know how it turns out!


In the meanwhile, a non-caloric holiday treat: a new episode of Consumerism WOW by Adam & me! Adam picked the things we talked about this month, including but not limited to this shirt design:

Thing #5


a happy exclamation point
Lauren: Your dour demeanor so frequently belies your gleeful mood that you want to reassure people that on the inside, you are super excited about everything. OR you want to trick people into thinking that you’re super excited about everything so they’ll be off their guard for the unequivocal pants-kicking that you’re about to deliver them.

Adam: Well now that you explained about the pants-kicking my success rate at fooling people is going right in the toilet! And hey, I’m not dour, Lauren! I am inscrutably magi-cranky, thank you very much.


Visit Adam's blog to discover his nefarious consumer desires and learn some Science! He sure learned me about rainbows.

Tuesday, December 1, 2009

recipe: sugared cranberries

Last winter I went through a phase where playing with melted sugar seemed like a really excellent idea, and through a simultaneous obsession with cranberries. Of course this happened eventually:

sugared cranberries
Sugared cranberries. Most recipes I've seen call for maceration overnight, but I prefer my method of gentle simmering -- it jellifies the inside of the cranberries without sweetening them very much, and once you apply the sugar crystal coating, each berry becomes an individual bite of cranberry sauce: a burst of tart, thick jelly contained by the crisp crunch of sugar shell. And they look gorgeous and festive as a plate garnish or table dressing with a warm & wintery holiday meal. Many thanks to Maria @ MommyMelee for the photo evidence.


Sugared Cranberries

INGREDIENTS

1/3 cup granulated white sugar (for coating)

1/4 cup granulated white sugar (for syrup)
2 tbsp water
1 cup fresh cranberries

1/4 cup additional sugar (for syrup)


METHOD

Set out a layer of parchment paper (or a plastic/silicone cutting board) on a flat work surface. Pour the 1/3 cup of sugar for coating into a medium (like, can-of-soup-sized) bowl, and set it by the paper/board.

Rinse the cranberries, but don't worry about drying them. In a 2-quart saucepan (i.e., smallish, but large enough to hold all of the cranberries in a single layer), stir together the water and 1/4 cup of sugar, and place over very low heat. Like, heat setting 1 or 2 out of 10. You'll want it to just simmer, but never reach a full boil. Stir the sugar occasionally until it's dissolved and just beginning to bubble.

Add the cranberries to the melted sugar, and stir gently to coat. Some (or even most) of the cranberries will split a seam in their skin to let steam out, but so long as they're not starting to gush jelly out into the pan, they're not too hot. If any start bursting completely open, take the pan off the heat for a moment and turn the temperature down.

Cook for about 3 minutes, stirring gently and frequently to keep the cranberries coated with the syrup. When the liquid in the pan begins turning pink, add the extra quarter cup of sugar. Continue stirring gently for another 3 minutes or so. You're looking for all of the sugar to be dissolved and the cranberries to look like they can't take much more heat without bursting.

Turn off the heat, but leave the pot on the warm burner to prevent the syrup from solidifying too much while you're working. With a slotted spoon, fish a scoop of cranberries (<10 or so) out of the pan and wiggle it to drain off some of the syrup. Add the cranberries to the bowl of sugar, and shimmy the sugar around in the bowl to coat them. If any of the cranberries are sticking together, poke them apart with a finger or clean spoon (carefully -- hot sugar can be very hot). Once they're coated with sugar crystals, gently pick the cranberries out (they should be cool enough to touch if you're quick) and place them on the parchment paper/board to cool, dry, and harden.

Coat the remainder of the cranberries in sugar, a scoop at a time. If towards the end of the batch you find the sugar crystals clumping instead of coating the cranberries evenly, just pick out the clumps of syrup and add a couple tablespoons of fresh sugar to the bowl. The sugared cranberries can be eaten/used as garnish as soon as they're cool enough -- maybe after they've been out of the pot for 10 minutes -- but if you want them to last for a day or two, allow them to dry for at least an hour on the sheet.

You can proceed this way through an entire bag of cranberries, using fresh sugar each time -- a 16 oz bag contains about 3 cups, or 3 batches. You want to keep the cranberries in a single layer in the pot, though, so that they cook evenly and thoroughly -- don't be tempted to cook a double or triple batch all at once.

It's best to store the sugared cranberries in an open container in a cool, dry place that's out of the sunlight, which may melt them. Do not store them in the fridge -- the moisture will make them melt for sure. You can seal them in a plastic baggie or container if you wish -- just put a layer of parchment between the cranberries and the plastic. Even so, the sugar coating may begin to melt after a few hours. Should the coating melt, you can reapply it without doing any particular damage to the cranberries -- they won't look as pretty the second time around, is all. They should keep for 2 or 3 days (if you can avoid eating them all, piece by piece, absentmindedly).

If you're the sort of person who hates wasting anything, you could add a few tablespoons of water to the remaining (pretty-in-pink) syrup in the pot, heat it and stir to dissolve, and pour it into a sterilized jar/bottle for use in tea/coffee/cocktails during the holiday season. It shouldn't have much if any flavor from the cranberries, and should last at least a month if you store it in the fridge until it's needed.