Showing posts with label recipes. Show all posts

Wednesday, December 19, 2012

gluten-free christmas cookies - almond, orange, clove

gluten-free christmas cookies

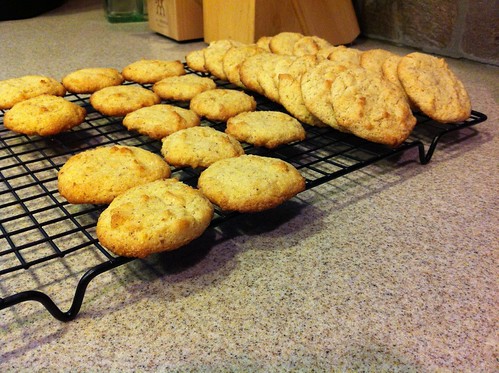
For me, Christmas cheer means cookies, and I'm not about to leave my gluten-free friends out in the cold. With bright orange, warm clove, and sweet almond, these got the ultimate thumbs-up -- total (joyful) annihilation -- on tree-trimming day.

A basic, chewy snickerdoodle recipe is a lovely start for cookies with no wheat flour -- it's forgiving as ol' St. Nick himself. (Let's hope Krampus isn't around.) If you have a preferred flour other than rice or coconut (even wheat), it'll probably work -- just keep the total flour input at 1 and 1/3 cups.

Gluten-Free Christmas Cookies
Makes 2-3 dozen

INGREDIENTS

1/2 cup almond flour (store-bought or home-ground -- grind first, then measure)
1/2 cup rice flour
1/3 cup coconut flour
1/2 tsp baking soda
1 tsp cream of tartar (if you don't have this, omit the baking soda and use 1 1/2 teaspoons baking powder to substitute for both)
1 orange worth of zest (~1 tbsp)
scant 1/4 tsp ground cloves
1/8 tsp salt

8 tbsp (1 stick) unsalted butter, room temperature
3/4 cup granulated white sugar
1 egg, room temperature
1 tbsp fresh orange juice


METHOD

Set our your egg and butter and get out your nonstick baking sheets -- or prep regular ol' ones with parchment paper, a baking mat, or a good coating of butter and a tapped-even sprinkle of flour. Preheat your oven to 400 degrees F.

Measure your dry ingredients (zest, almond meal, coconut flour, rice flour, salt, and leavening agent/s) into a medium bowl and whisk to combine.

In a larger bowl, add your butter and sugar. Using an electric beater on medium speed, cream them together for 2 minutes. Add your egg and orange juice and beat for another minute to incorporate them evenly.

Add your dry ingredients to your wet ingredients and mix by hand to combine. It'll be fairly wet and sticky. Drop rounded teaspoons of dough onto the prepared baking sheets, leaving 2 inches between each to allow for spreading.

Bake for 8-10 minutes -- check 'em at 8. When they're done, they'll be golden around the edges and will look dry on top. Also, they'll be more springy than mushy if you poke the top with a finger.

Leave 'em on the baking sheets for a couple minutes to firm up, then remove them to a wire rack until they're cool enough to eat. Or store, I guess. These keep in a sealed container for two or three days, though they'll lose some of their crisp. Try layers of parchment paper between the cookies to preserve crispness.

If you'd like to make the dough ahead, you could seal it up and refrigerate it for up to a week or freeze it for up to 3 months, then bake on demand.

gluten-free christmas cookies

Thursday, July 19, 2012

recipe: s'mores icebox pie

I'm generally a proponent of making food from nothing more than recipe scraps, raw ingredients, motley kitchen equipment, and your own wits. Some days, that's just not feasible. Perhaps -- just for example, mind -- you spent the night before a potluck luncheon out until four in the morning watching Magic Mike and then, unrelatedly yet thematically, helping an erstwhile Atlantan introduce her new husband to the Clermont Lounge.

Perhaps not. The point here is that we all experience lapses in baking-from-scratch capacity, whatever the cause. For those days, it's good to have a backup plan that will allow you to maintain your reputation as an impressive baker with a minimum of work.

Enter the kitchen blowtorch.


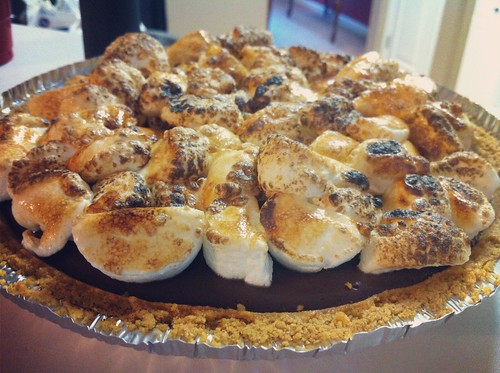
s'mores pie


S'mores Icebox Pie
Idea adapted very, very loosely from Epicurious (more about that below). You'll need a culinary blowtorch -- I love mine. Serves eight to twelve.

INGREDIENTS

a prepared 9-inch graham cracker pie crust
a 5-6 oz. box (or the equivalent weight in smaller boxes) of your favorite stovetop chocolate pudding mix
whole milk OR half & half (however much the pudding box tells you you'll need)
a bag of marshmallows, regular- or mini-sized (you'll use ~5 oz.)
 
METHOD

Prepare pudding according to directions on box. If you've got some cocoa powder in the house, toss a couple tablespoons in there for bonus flavor. When it's thickened to your liking, immediately pour pudding into pie crust and smooth surface with the back of a large spoon.

Refrigerate -- uncovered if your fridge isn't stinky, or covered loosely with aluminum foil if it is -- for at least 3 hours, until pudding is more firm than wiggly. I don't recommend covering the pie with the crust package lid -- the crust will get soggy around the edges from condensation.

When everyone's just about ready for dessert, prepare your marshmallows. If you have mini marshmallows, this will consist of opening the bag. If you have larger 'mallows, cut them into rough thirds or smaller -- kitchen shears work best for this. Cut up enough to cover the entire surface of the pie in heaps.

Get your pie out of the fridge. (If you covered it, take care -- lots of condensation will have collected on the cover. Once it's off you can dab any droplets from the pie's surface with a paper towel.) Slice the pie.

Working with one slice at a time, plate the pie. Pile marshmallows on top of the slice at hand, completely covering the surface. Set your blowtorch's gas output to low and hold the torch 4+ inches away from the marshmallows. Roast 'em, rotating the plate to get as much caramelization from as many angles as possible. Blow out any lingering flames. Serve.


ADDITIONS, SUBS, AND ALTERNATE IDEAS:

You could probably add a tablespoon of whatever booze you like to the pudding during cooking for extra flavor. Whiskey or something orangey would be nice. And I'd be curious to see whether it'd be possible to use a jar of marshmallow fluff in place of the 'mallows.

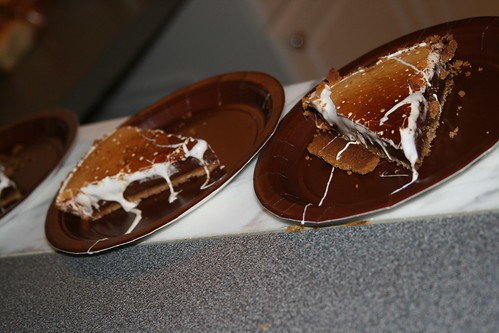
Now, if you're having the kind of day where you feel like a superhero of baking, you could just go ahead and make the aforementioned Chocolate S'more Pie from Epicurious. I did that one Thanksgiving and it was fairly spectacular(ly messy):


IMG_6500
The marshmallow layer is browned under the broiler -- which the chocolate layer can stand up to 'cause it's a very thick baked custard.

IMG_6504
Photos by Maria Melee. At the moment, I was up to my elbows in molten marshmallow.


If you try anything different, let me know how it comes out!

Monday, March 21, 2011

recipe: homemade marshmallows

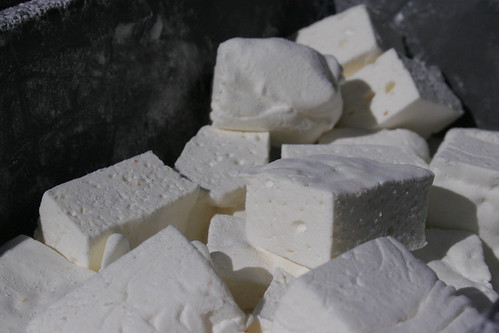
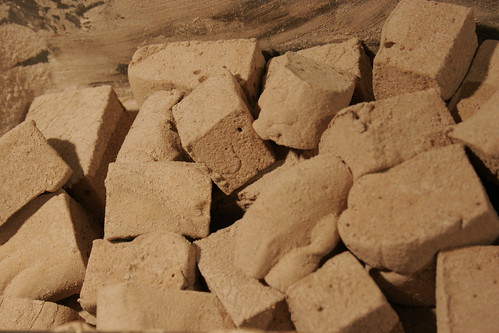
Ever since I realized that it's within my power to make marshmallows, I, like a young god high on new-found might & processed sugar, have made a lot of marshmallows. I'm still experimenting with flavors but I've got the technique pretty well down, so I figured I'd share.

coffee mallows long


What follows is the base recipe. It's kinda long because a) I talk a lot and b) sugar is terrifying so I wanted to explain myself superextra clearly. To minimize v-scroll here, I'll do a followup post in a couple days with some notes on flavorings.

clementine mallows


homemade cocoa marshmallows


Homemade Marshmallows
Adapted from Alton Brown. You can watch the 'Puff the Magic Mallow' episode of Good Eats to see the general process, but I actually don't recommend following all of his instructions from that episode.
Makes ~24 1.5-inch marshmallows or ~32 1-inch marshmallows


INGREDIENTS

1 package gelatin
1/6 cup cold water

1/2 cup granulated sugar
1/3 cup light corn syrup
1/6 cup water
Pinch salt

1/3 tsp vanilla extract

1/4 cup cornstarch
1/4 cup powdered sugar

~1/2 tbsp butter or oil or etc. for greasing


EQUIPMENT

Stand mixer with whisk attachment
2 spatulas (preferably 1 stiff one for scraping and 1 large & softer one for pressing)
Medium saucepan
Bread pan
Fine-mesh sieve (you can also use a tea strainer with patience)
1 ramekin/small bowl
1 small (~1-cup) container with lid
Candy or probe thermometer
Timer


PREP

Working with sugar is scary because it requires both speed and caution. I like to prepare all of my ingredients & equipment before I start so's I won't forget something and end up with no place to put boiling edible napalm. So.

Prep the gelatin: Empty 1 packet of gelatin into a small bowl or ramekin. Add 1/6 cup of cold water (you can go over by a couple teaspoons), stir, and set aside to bloom (i.e., absorb the water and soften).

Prep the sugar: Add your sugar, corn syrup, salt, and 1/6 cup of water to a medium saucepan. You don't even need to stir it. Set aside.

Prep the powder coating: Measure your cornstarch and powdered sugar into a small bowl or resealable container. Stir to combine but don't worry about it being lumpy -- you'll be sifting it onto everything anyway. Set aside.

Prep the equipment: Grease everything. Grease the bowl of the mixer up to the rim. Grease the heads of 2 spatulas. Grease your bread pan up to the rim. If your cat likes to get all up in your fries while you're cooking, grease your cat. (It'll thank you later.) Use whatever fat and application method you like best -- I like peeling the paper back from the end of a stick of butter and rubbing it over the surface of the object to be greased, then using my fingers to apply the coat evenly and completely.

Okay.


METHOD

Set up your stand mixer so it's ready to go, and add the bloomed block of gelatin to the mixer bowl. Get out your candy or probe thermometer.

Next you're gonna cook the sugar mixture to the soft ball stage (240 degrees F/120 C). Place your saucepan full'o'sugarstuff over medium heat, swirling the pan occasionally to ensure even heating. (Because sugar likes being in a crystal state, you generally don't want to agitate sugar mixtures by stirring them -- if you stir, it'll be more likely for a rogue sugar crystal to become the nucleation center of crystallization and make the mixture go grainy. Corn syrup, being syrupy & therefore a stabilizer, helps prevent that, and that's why candy recipes call for it.) When the sugar starts to bubble, place your thermometer of choice in the pan and swirl the mixture continually until the sugar reaches 240 degrees F (120 C). Immediately take the pan off the heat. Turn your stand mixer on its lowest setting, and slowly (carefully, respectfully) pour the sugar syrup down the side of the mixer bowl towards the bottom. The goal here is to keep the syrup moving without risking it hitting the whisk and splattering you. That would be bad.

Once all/most of the syrup is in the mixer (a little syrup loss is totally acceptable), crank the mixer up through its settings until it's going full-tilt. Set a timer for 15 minutes.

While the mixer's doing its thang, prepare your bread pan: Put a tablespoon or two of your powder mixture in the fine-mesh sieve and tap a good, thick layer of powder into the bottom of the pan, and a finer coating up along the sides. Unlike buttering & flouring a pan for baking, you don't want to tap the edges of the pan to move the powder around -- it'll clump and stick. Just sift it in there and set the pan aside until the timer goes off.

When the timer goes off, peer into your mixer bowl and take note of the texture of the batter -- it'll be sticky and stringy as the whisk moves through it. Measure out your vanilla extract, turn the mixer speed down to low, and pour in the vanilla. Give it a few seconds to incorporate, then turn the mixer speed back up to high for ~1 minute, or until the 'mallow batter reaches about the same stringy consistency that it had before you added the vanilla.

Time to get the marshmallow batter into the pan. You'll have to work very quickly because the batter will become stiff and difficult to remove from the mixer's bowl in less than a minute. Put your greased spatulas within reach and turn off the mixer. Clean off the mixer's whisk first, using one spatula to gather batter and the second to scrape the batter off the first spatula and into the mixing bowl (or straight into the waiting bread pan, whichever's easier depending on your mixer setup). Using the same gather/scrape method, firmly scrape the rest of the batter out of the mixing bowl and into the pan. You can just kinda glop it in there -- the important thing is getting as much as possible out of the bowl before it sets.

Once you've got all the batter you're gonna get in the pan, use your spatulas to press the batter down into the pan evenly, pushing it into the corners and flattening it out. You should still be working kinda quickly, but this part is much more forgiving. Don't be afraid to press down pretty firmly. If any unaesthetic ridges or stringy trails form along the surface, just run your hands under the faucet, flick off the excess water, and gently smooth the batter out with your damp fingertips.

When you're satisfied with your 'mallow loaf, set the pan somewhere where it won't be disturbed for ~4 hours (or up to overnight). You can tent it very loosely with tin foil or a paper towel if you're afraid of things (dust, kids, dogs, etc.) getting into it, but you really want the loaf to be able to breathe and dry out, so don't cover it completely.

(Cleaning up after this step won't be as terrifying as it seems 'cause marshmallow goo, while tough to wrangle out of a bowl and into a pan, is easy to wash up. It's made entirely of things that dissolve in water. Yay science!)

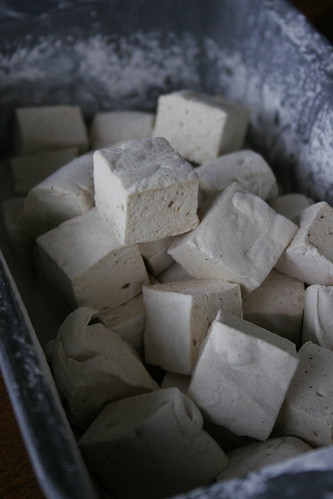
Once the loaf has rested for 4+ hours, get out a cutting board and sift a good layer of your powder mix on its surface. Sift a layer of the powder on top of the 'mallow loaf, too, then turn the loaf out onto the cutting board. Cut the loaf into 3 or 4 strips lengthwise, dust the whole thing with more powder, and dip the cut edges of the strips into the powder on the board. Then push the strips back together into loaf form and cut the strips widthwise into squares (or rectangles, rhombuses, or other quadrilaterals; no one will care if the delicious homemade marshmallows you give them are kinda misshapen). Dust the whole thing with yet more powder.

Pull one of the marshmallows away from the rest, dip each cut side in the powder on the board, and then dust the excess powder off with your fingers, taking special care to make sure that there's no buildups of powder stuck in the marshmallow's crags and crevices (that would not be delicious, and can get gross and grainy if you let it sit).* Toss the finished marshmallow back into a large plastic bag (don't cramp your 'mallows). Repeat with each of the marshmallows.

*Boyfriend's hack for this step, which works nearly as well and takes like three seconds rather than 15 minutes: Pull a couple handfuls of well-powdered marshmallows apart from each other and toss them in a colander, then, over your sink, shake and toss the marshmallows to coat with powder.

You can store the marshmallows for up to a month in a sealed plastic bag or other airtight container -- they might get a bit stale around the edges after the first couple weeks, but will still be delicious, especially when roasted over fire/melted in cocoa.

Friday, December 24, 2010

recipe: linzertorte

Some facts about the linzertorte: 1) It is basically an almondy cookie cake. 2) It is filled with raspberry jam. 3) It is spiced to taste like Christmas. 4) The amount of effort it takes to make < the amount of impressed your friends & family will be.

By "facts" I might've meant "reasons why linzertortes are a holiday tradition in my family". Here is one additional reason:

linzertorte

I never feel like it's really the holidays until I've made one of these. It's the perfect thing to take to parties, and can safely be made a day or two ahead (fact 5: it's tastier after a day or so) and/or in steps, as your schedule allows.

Linzertorte
Adapted from The Joy of Cooking, Not Derby Pie, and The Joy of Baking.
Serves ~12 (it's very rich, so small wedges will do)


INGREDIENTS

1 1/4 c. all-purpose flour (If you like/have white-whole-wheat, 1/2 c. of that plus 3/4 c. all purpose also works)
1 c. almond flour (or fine-ground blanched [skinless] almonds)
1/2 tsp cinnamon
1/4 tsp cloves
1/4 tsp salt
1 tsp lemon or orange zest (1 lemon or ≥1/2 orange worth)

2/3 c. white granulated sugar
3/4 c. (1.5 sticks) butter
2 egg yolks

1 1/4 c. (~1 jar, ~10 oz.) tasty raspberry preserves
2 tbsp fresh-squeezed lemon or orange juice


METHOD

Add your dry ingredients into a medium bowl (you can zest the citrus straight into the bowl to capture all the good zesty oils) and whisk to combine.

In a large bowl, cream together the butter and sugar for ~3 minutes, until they've lightened in color and texture. Beat in the egg yolks for ~1 minute until well incorporated. Stir in the dry ingredients, 1/3rd-ish at a time, until well combined.

Divide the mixture into 2 parts, one a bit larger than the other -- about 60%/40%. Ball & smush one part in your hands until it's happy (read: non-crumbly) enough to stay in ball form, then flatten it slightly into more of a disc. Do the same for the other! Wrap each disc separately in plastic/foil/a sandwich bag and pop them both in the fridge. They need to chill for 30 minutes at the very least, and preferably at least an hour. They will not be harmed by hanging out in there for a whole day, in fact, if you find that you've got Other Things To Do.

When the dough is chilled and you're ready to bake, butter & flour a 9-inch springform. (A cake or tart pan would also work, provided it's at least 2 inches deep.) Prepare to roll your dough out: sprinkle some flour on a large surface (I like sticking a piece of wax or parchment paper to the counter with a few drops of water and rolling on that for ease of turning the dough and moving it into the pan, but your mileage may vary if you can't get the paper to stick), get some flour on your clothes/face/hair, rub your rolling pin down with some flour, panic.

Next, stop panicking. This is not pie crust, this is cookie crust. It's really forgiving. Take out the larger piece of dough and roll it out into a big, evenly thick, mostly circular shape that's ~1-2 inches larger in diameter than your pan. A few cracks around the edges are okay -- just pinch them back together. Drape the dough down into the pan as centeredly as possible and press the bottom down and the sides up. The sides need to be 1/2 to 1 inch high -- just high enough to hold your jam. You can smoosh the dough around, breaking chunks off where there's too much and adding them where it's sparse -- like I said, not a pie crust.

This is a good time to preheat your oven to 350 degrees F.

Measure out your jam into a small bowl and mix in your citrus juice, then pour/spread the mixture evenly into the crust.

Take the second half of the crust out of the fridge and roll it out into an oval that's about as wide as your pan the short way across -- it'll be a bit thinner than the bottom crust was. With a large, flour-dusted knife, slice it width-wise into strips 1/2 inch wide.

Now, if you're very motivated you could lattice the strips properly across the top of the jam-filled crust, but what I do is just lay one set of strips down across the top, 1/2 inch apart and parallel to each other, and then lay a second set down perpendicular to and right across the top of the first set. It'll still look plenty pretty. If you do it my way, I think it's helpful to start in the middle with the longest pieces and move towards the edges with shorter pieces.

Either way, you're going to want to press the ends of each strip down into the edge of the crust. Trim off any extra lengths and smoosh them down into any gaps between the strips, and use any leftover dough to further even out the rim of the crust. I like rolling the excess dough into snakes and using strips & bits of those to fill in the gaps.

I brushed an egg wash onto the linzertorte pictured (beat 1 egg with a fork and then use a pastry brush to spread a thin layer over the crust), but it's not necessary. Iiii actually think it's prettier without it.

Pop the torte in the oven and bake for 40 minutes, or until it smells lovely and the crust is golden brown and pulling away from the edges on the pan. It'll be crumbly & sorta dry when it's warm and will get better the longer you let it sit, so try to let it cool completely before serving -- it might take a couple hours. You can decorate it with a bit of powdered sugar (put a tablespoon or two in a fine mesh sieve and tap the edge while holding it over the torte to sprinkle it on) if you like. The torte will be even nicer the next day, once the jam has had a chance to seep into the crust a little and all the flavors have really melded, so I recommend baking it a day ahead if you have time, or saving a slice for breakfast if you don't. Just seal it up in airtight containers and finish it within a week or so if there happens to be any leftover.

Friday, November 12, 2010

recipe: Not Quite Mom's German Apple Cake

Halloween may have super-sneak-ninja attacked me this year, but I had Fall all figured out. The day that the scent of cinnamon brooms battered me at my first step into my local grocery store, I bought some Granny Smith apples, went home, and apropos of no greater occasion than the season made this version of my mom's German apple cake.

cake topped with chopped apples, with a wedge cut out

If you wanted to be proper about it, you'd use all white flour and all white sugar in this cake to achieve the sweetest richness, and you'd slice the apples thin-thin-thin for galette-style decoration and chewy caramelization. My modifications yield an earthier, more everyday cake for those of us who don't own a mandolin and have come to comfortable terms with the fact that we'll wind up eating leftover cake for breakfast, and will feel better about it if there's a bit of whole wheat flour involved.

Dense and buttery with a bright, tart kick from the apples and a warming touch of cinnamon, this cake is Fall comfort. Unmodify it for a fancy party treat, or try my relaxed version for a laid-back, party-optional sort of thing.


Not Quite Mom's German Apple Cake
Serves 8-12 people.


INGREDIENTS

3 granny smith apples
1 1/2 tsp ground cinnamon
1/4 cup sugar
half a lemon, de-seeded as best as possible

2/3 cup all-purpose flour
1/3 cup whole wheat flour
1 tsp baking powder
1/2 tsp salt

2/3 cup white granulated sugar
1/3 cup brown sugar
1/2 cup unsalted butter, softened
2 eggs
1 tsp vanilla extract (or 1/2 vanilla bean, scraped)
2 tbsp bourbon, if you've got it


METHOD

Peel & core your apples, slice them into wedges, and chop the wedges into roughly equal-sized chunks. As you go, place the resulting applebits in a medium bowl, tossing them with a squeeze of lemon juice to prevent browning each time you add a batch. Once all 3 apples are chopped, add the cinnamon & sugar and toss/stir/muss about with your hands to coat the apples. Set aside to macerate (i.e., soak & soften) while you prepare:

A pan! V. important to the cake-making process. I used a 9-inch springform for the cake in the photo, but a larger round or square should work so long as you shorten the baking time. Butter and flour your pan of choice and set aside.

Set your oven to 350 degrees F.

Measure your dry ingredients out into a medium bowl and whisk gently to combine.

In a larger bowl, with an electric mixer on medium speed, cream together your butter and sugar for ~3 minutes or until the mixture has lightened in color and texture (indicating that cake-buoying air has gotten into it). Add the eggs, vanilla, and optional bourbon and beat for another 2 minutes to combine thoroughly.

Add your dry ingredients to you wet ingredients and stir with a spoon/spatula/other nonelectric device to combine. The batter should be shiny and smooth (keep stirring if it's not). Pour it into your prepared pan and wiggle the pan to distribute evenly.

Drain most of the liquid from your apples (they can be wet but shouldn't be dripping) and scatter the pieces across the top of the batter, pressing them in just slightly.

Pop the pan in the oven and bake for 60 minutes. Well, check it around 50 minutes. You're looking for the sides of the cake to be deep golden and pulling away from the pan, for the liquid between the apples to be sizzling merrily, and for little bits of batter to be poking up between the pieces of fruit.

Remove from the oven and let cool in the pan until said pan is handleable, then either remove it from the springform, carefully flip it out of your non-springform pan (using a plate to flip with instead of a wire rack), or simply slice and serve the cake from where it is. Seal tightly and refrigerate any leftovers, which should keep for a week.


*If you leave it in the oven too long, no worries: you can abuse this cake and it'll still come out okay. As long as it's not actually charred, just stick it in the fridge in a tightly covered container overnight and it'll be lovely and moist the next day. When you eat it for breakfast. Because that's what responsible adults who have used whole wheat flour do.


[I previously posted an iteration of this recipe done with pears instead of apples, which is lovely if you have heathens friends who dislike cooked apples.]

Tuesday, July 6, 2010

recipes: lemon curd and a mango-blackberry tart

Did I mention that I have the best (if slightly self-serving) group of friends ever in the whole Universe?

This was my birthday present. (Thank you, friends!) Having it makes me unafraid of pastry dough for the first time ever, and being unafraid of pastry dough makes it necessary for me to stock lemon curd.

If you've never had lemon curd, it's a bit like a tart citrus version of apple butter -- or like a creamy marmalade minus the bits of rind. It plays with sour-sweet flavors, has a pudding-smooth texture, and is terrific as a spread on toast, waffles, pancakes, muffins, or other breakfast/brunch baked goods -- or it can be used as a filling or glaze for cakes, cupcakes, or dessert pastry. I love tart flavors and generally prefer less sweet desserts, so I think it should be used in all of the above pretty much all the time.

I made a batch of lemon curd a couple weeks ago, meaning to spread a layer of it atop the crust and beneath the fruit (i.e., mascerated mangoes and fresh blackberries) in a pastry based on smitten kitchen's simplest apple tart.* In my pastry-assembling excitement I completely forgot to put the lemon curd in, but I melted 2 tablespoons of lemon curd plus 1 tablespoon of butter to brush over the crust & filling instead of just butter, which worked wonderfully. It was so successful, in fact, that I also forgot to take any pictures of it. I fail as a food pr0nographer.

Lemon Curd
Adapted from Haalo of Cook [Almost] Anything at Least Once, who got it from Stephanie Alexander.
Makes ~12 oz. of lemon curd


INGREDIENTS

4 egg yolks
3/4 cup (150 grams) white granulated sugar, the finer-grained the better (but plain ol' sugar is okay too)

5 tbsp butter (70 grams)
7 tbsp lemon juice (~3.4 oz., or 100 mls, or ~3 lemons' worth)

METHOD

Combine the egg yolks and sugar in a bowl and blend on medium-high speed for 3 minutes, until the mixture has lightened to a cream color.

Melt the butter in a small saucepan on medium-low heat, then add the lemon juice and stir to combine. Stir a couple tablespoons of the hot liquid into the yolk & sugar mixture to temper it, then add the yolks & sugar to the saucepan. Whisk constantly until the mixture just reaches a boil (~10 minutes or so, depending on how hot your stove runs), at which point the lemon curd will thicken sort of drastically and separate a bit, turning a brighter yellow underneath a layer of cream/foam.

If you happen to have the equipment and wherewithal to sterilize and seal jars, you could jar the lemon curd and store it at room temperature for up to 3 months until opened, at which point it should be kept in the fridge (for up to 4 weeks). If, like me, you're better with Tupperware than boiled glass, just seal it up and pop it straight into the fridge. It'll need to sit awhile to set to its proper, jellylike firmness.

I plan to experiment with making all sorts of other fruit curds using this recipe by simply swapping out the juice and adjusting the sugar content -- if you happen to try making any other flavors, let me know how it goes!


*Simpleish Mango & Blackberry Tart
Adapted from Deb of smitten kitchen, who got it from Alice Waters.
Serves 6-8


Follow Deb's excellent instructions on making and refrigerating the tart's crust. In addition to that, you'll need:

INGREDIENTS

4 large red/green mangoes (or ~8 smaller yellow [champagne] mangoes)
1/3 cup white granulated sugar (I'd try less, maybe 1/4 cup, with the yellow mangoes)
At least a half-pint of blackberries (or your other berry of choice)
~4 tbsp prepared lemon curd (optional)

2 tbsp butter (or 1 tbsp butter + 1 tbsp lemon curd)
2 tbsp turbinado/raw granulated sugar (optional but very pretty -- white sugar would work fine too)

METHOD

While the crust is chilling, cut your mangoes into cubes, and stir your sugar into the cubes. Let the cubes sit for at least half an hour, stirring occasionally to redistribute the mango in the syrup. This is called masceration, and it'll help break down the stringiness of the mango and work some of the moisture out of fruit so that you don't wind up with an overly soggy pastry crust.

Once the mango is mascerating, rinse and dry a pint of blackberries. You could also use blueberries, or slice some strawberries into vertical quarters -- use whatever's ripe and sweet and readily available. (You may end up only using a half-pint, so if you're on a budget you could buy less berries -- I just like having extra around to make up for inevitable berry loss due to over-ripeness and snacking.)

When the pastry dough is chilled and the mangoes are mascerated, get out two clean bowls. Use one to drain the mango syrup into (through a fine mesh sieve if you've got a big one, or through a pasta strainer or even a slotted spoon in a pinch) and the second to hold the drained mango pieces. Butter and flour an ~9-inch tart or pie pan (with a removable bottom, preferably), and roll the dough out to ~4 inches in diameter larger than your pan. (I always get lazy when I'm rolling dough out, but you want to roll it enough so it'll come up over the sides of the pan by at least an inch.) Drape the dough into the pan, gently tucking it down into the corners of the pan and letting the edges hang over the sides. Get your oven heating to 400 F.

If you've made a batch of lemon curd, try spreading maybe 4 tablespoons across the crust with a pastry brush or the back of a spoon. Arrange the mango pieces evenly in the crust -- it's okay if you don't have quite enough to fill it. (If you didn't use the lemon curd, you could use a couple tablespoons of the mango syrup to help fill in any gaps.) Spangle the tart with the berries, then fold the loose edges of the crust over the filling. It doesn't need to look perfect -- rustic and tasty is what you're going for with this thing.

Melt 2 tablespoons of butter (or 1 tablespoon each of butter and lemon curd) and spread it over the edges of the crust and the top of the fruit with a pastry brush or the back of a spoon. Sprinkle 2 tablespoons of sugar over the crust if you wanna make it extra pretty.

Pop the tart in the oven for 30 minutes, coming back to rotate it every 10 minutes to ensure even browning. Mango and berries don't need all that long to bake, so really you're just looking for the filling to be bubbly and the crust to reach a nice, rich golden brown. Once it's out, let it cool for 5-10 minutes, then slice and serve -- whip cream wouldn't go awry with it, but I think it stands really well on its own. If you happen to have any left over, wrap it loosely and refrigerate it. It should keep for 2 to 3 days.

Monday, March 8, 2010

recipe: chocolate Guinness cookies

I made these beer-flavored cookies for the Great Guinness Toast a couple weeks ago. The recipe is cobbled together from my double-chocolate bacon cookie base and this White Beer Cookie recipe from an episode of Ultimate Recipe Showdown on Food Network that I never watched, but discovered anyway through the wonderment of Google dot com.

They took a bit of trial and error -- I wound up using sugar in the beer syrup instead of honey (which overpowered the Guinness), and my attempt to compensate for the sugary beer syrup by adding less sugar to the dough created tiny cakes rather than less-sweet cookies. (I do the Science so you don't have to.) The end result was a cookie with a hit of chocolate at first taste and an addictively bitter bite at the back of the palate. They go perfect with a pint! And if you're looking to bring something to a St. Patrick's Day party, I can guarantee that adding stout to cookies will make them more Irish than green food coloring.

Chocolate Guinness Cookies
Makes ~24 cookies. Adapted from Kathy's chocolate cookie recipe on Allrecipes.com and from Sean LaFond's White Beer Cookies, with thanks to Sarah's Sweet Tooth for testing.


INGREDIENTS

Guinness syrup

2 bottles of Guinness (12 oz each)
5 tbsp sugar

Cookies

1/2 cup (1 stick) unsalted butter, softened
2/3 cup white sugar
1/3 cup brown sugar
1 egg, room temperature
1 teaspoon vanilla extract (or 1/2 a vanilla pod, scraped)
1/3 cup prepared Guinness syrup

3/4 cup all-purpose flour
1/3 cup cocoa powder
1/8 teaspoon salt
1/2 teaspoon baking soda [NOTE: If you're using Dutch-process (aka pre-alkalized) cocoa powder, you should use baking POWDER instead. Otherwise you'll end up with oven-baked pancakes.]

1 tbsp powdered (confectioner's) sugar for pretty


METHOD

Set out your butter and egg first to allow them to start warming up to room temperature.

For the Guinness syrup, pour both bottles of beer into a small saucepan and add the sugar. Set the pan over medium-high heat and bring the liquid to a boil, stirring to help the sugar dissolve. When the liquid hits a boil, lower the heat to a busy simmer and let the liquid reduce to a syrup, stirring more than occasionally but less than frequently. It'll take 20 minutes or more -- you're looking for it to become a rich amber color, and gain the consistency of thin honey or thick maple syrup. Also, it'll begin foaming really aggressively when you stir it (more aggressively than that... wait for it...) and will be almost exactly 1/3 cup in volume.

Take the saucepan off the heat and transfer the syrup to a small dish to allow it to cool down.

Get your oven preheating to 350.

In a medium mixing bowl, combine your dry ingredients (flour, cocoa, baking powder or soda, and salt) and stir with a whisk to fully incorporate. (This helps break up any clumps and get the leavening agent fully distributed.)

In a large mixing bowl, combine your softened butter (you can just nuke it for a few seconds if, like some authors of this recipe, you forgot to set it out earlier) and your white & brown sugars. Cream them together with an electric blender on medium speed for 2-3 minutes, until the mixture has lightened in color and begun to hold the wavey shapes that the beaters sculpt it into as they pass through it. Add your vanilla, egg, and Guinness syrup, and blend for another minute or so until everything is incorporated.

Put down the beater! You'll want to use a spoon or spatula for this next part so that you don't overwork the flour. Add the dry mixture to the wet mixture and stir gently (but, y'know, firmly) until no dry pockets remain. The dough will be sticky.

Butter and flour a baking sheet (unless it's REALLY high-quality nonstick). Roll a rounded teaspoonful of dough into a ball in your hands and then flatten it slightly before placing it on the sheet, and repeat until you fill the sheet, leaving a couple inches between each cookie. (If you don't like getting your hands dirty, you can drop the dough onto the sheet directly from the spoon and flatten it slightly once it's on there, but I find that they come off easier when you do the flattening beforehand.)

Pop the sheet in the oven and bake for 8-10 minutes, or until the tops of the cookies look dry and provide a bit of springy resistance when you poke them (carefully, folks) with a fingertip. Remove the sheet from the oven and allow the cookies to continue cooking on it for a couple minutes before transferring them to a rack (preferred) or plate (less preferred) to cool.

For the pretty: Once the cookies are cool to the touch, put maybe a tablespoon of powdered sugar in a fine mesh sieve and hold the sieve over the plate of cookies. Tap the edge of the sieve to dust the powder onto the cookies. Pretty! (If you're feeling more ambitious than I was that night, a perfect topping/decoration might be a drizzle of white chocolate. Maybe with a bit of Irish cream mixed in carefully as the chocolate cools?)

I can't tell you how they hold up after the first day 'cause none of them survived the night. If you find out, you tell me. (Hypothetically, they should do okay in a sealed container for a day or two before they start going stale, and 10 seconds or so in a microwave should help perk them up after that.)

Wednesday, December 23, 2009

recipe: simple stovetop egg nog

Egg nog is easy to make! Like crème brulee, except you don't bake it. If you're thinking, "well that sounds hard and doesn't encourage me to try making egg nog," I bet you've never had anyone show you how dangerously easy it is to make crème brulee. And I'll fix that sometime soon. But for now, just consider: Do you have half an hour to stand around your stove stirring something? If so, you can make some egg nog.


Simple Stovetop Egg Nog
Adapted from Alton Brown, Simply Recipes, and Cook's Illustrated.

Makes a quart of nog, which serves 4 to 6 people, depending on how much of it they want to drink. If you have any serious egg nog enthusiasts, you might want to double the recipe.


INGREDIENTS

2 eggs
3 egg yolks*
1/4 cup granulated white sugar
1/8 tsp salt (I used sea salt 'cause it has plenty of time to dissolve)

1 cup heavy cream (that's a half-pint)
1 cup milk (anything from 1% to whole will be fine, I might not try nonfat)
2 whole cloves (do NOT substitute ground cloves)

1/2 tbsp vanilla extract (or half a bean, scraped with pod reserved, which would be so tasty and fancy-looking)
1/4 cup bourbon or dark rum (technically optional. But I used 1/3 cup, an' what?)
1/2 tsp fresh-grated nutmeg (the fresh seriously makes a delicious difference)


METHOD

In a heavy 2-3 quart saucepan, combine your eggs, egg yolks, sugar, and salt. Whisk them briskly for at least a minute, until the mixture is foamy and has lightened a bit in color. (If you're using a nonstick pan, be sure to use a silicone-coated whisk -- and if you don't have one, do the whisking in a mixing bowl! You don't want any Teflon in your egg nog.)

Add a half cup of cream and whisk it in good -- you want the mixture to be smooth and fully incorporated before you add more. Add the remaining half cup of cream and whisk again until smooth. Do the same with the milk, a half cup at a time. This makes sure that all the proteins and fats from the eggs and milk are snuggled in with each other so that your nog will be satin-smooth. Drop in the whole cloves (they'll steep while the mixture heats).

Set your pot of nog on the stove, and turn the burner to the second lowest setting. Set a timer for 25 minutes. Ready for an arm workout? Start stirring, sir and/or madam. (I like using a whisk and keeping it going at a pretty good clip, but if you're using a nonstick pan and you don't have a safely coated whisk, a wooden or plastic spoon at a splash-avoidingly sedate pace will be fine.) You want to keep stirring constantly and heat the mixture gently-gently-gently. This may try your patience, but don't be tempted to turn the heat up. After about 10 minutes the nog should start steaming a little, and you want to maintain that steam without letting it reach a full simmer. If you let the mixture simmer, you'll have finely scrambled eggs instead of lovely drinkable custard. So if it begins steaming really profusely, turn the heat down to low and keep stirring.

If you have to stop stirring and step away for a minute or so, don't worry, you won't kill the egg nog. But it's best to keep it moving so that a) a skin won't form on top [ever made gravy?], and b) it won't heat too much or too unevenly. See above re: scrambled eggs.

You'll know the egg nog is done when a probe thermometer tells you it's 160 degrees F. Or when you dip a metal spoon in the nog and then watch the way that the custard drips off the back of the spoon -- it should coat the spoon entirely and evenly, and pool a little thicker along the edge before dripping off. Or when the timer you set goes off, provided that the mixture has been putting off steam for at least 10 minutes.

The egg nog will thicken a bit as it cools, but if you like a thicker egg nog, you can safely continue cooking it for another 10 minutes or so, stirring all the while. I kept mine going for a full 35 minutes, and it turned out like melted ice cream (yay). If you're not going to be adding any booze, I'd recommend taking it off the heat at 25 minutes.

Once it's off the stove, add in your flavorings and stir (again, more, yes) to incorporate. Pour or ladle the egg nog through a fine mesh sieve into a happy-in-the-fridge container (I used a cleaned-out Chinese delivery soup container 'cause I'm highfalutin') and cover it tightly. (If you don't have a fine mesh sieve, you can skip this step -- just fish out the whole cloves. The straining gets out any little lumpy egg bits and perfects the texture, but it'll be fine without this step.) Refrigerate for at least 3 hours, and up to 3 days.


MAKIN' IT FANCY

You can serve this egg nog plain -- just stir it first (your arm should have recovered by now) 'cause it'll have separated a little. Or you can:

--Sprinkle an extra bit of freshly-ground nutmeg on top of each serving for dual-purpose eye/nose-pleasing decoration. AND/OR:

--Whip 1/2 cup of heavy cream until it forms soft peaks, and gently fold/stir it into the egg nog. (This will give the egg nog a very pretty, snowy-looking layer of cream on top when you serve it.) OR:

--Whip 2 egg whites until they form soft peaks, and gently fold/stir them into the egg nog. (I have not tried this so I don't know what it does! But Alton Brown thinks it's a good idea, and he knows stuff.)


FLAVOR OPTIONS

If you're cooking for people who can't have alcohol, a teaspoon of (nonalcoholic) rum flavoring added at the end with the vanilla and nutmeg might be a nice addition.

If you order flavored lattes with extra pumps of gingerbread or pumpkin spice syrup: Consider ignoring my recommendation about the whole cloves. In fact, forget the whole cloves. Instead, when you take the pot off the heat, add a scant 1/8 tsp ground cloves and a scant 1/4 tsp cinnamon in addition to the other flavorings.


*OH HAY, A TUTORIAL

Separating eggs takes a bit of practice, and is a bit messy, but don't be intimidated: Working over your sink, tap the waistline of an egg on the edge of a bowl or on the surface of the counter a couple times until a crack forms. Hold the egg upright over the sink, and carefully open it the way you'd open a hinged box. A bunch of the egg white will fall into the sink! Pull the top half of the egg shell off. If you've got two somewhat even halves of shell, you can gently tip the yolk into the empty top half, being careful not to snag the yolk on the sharp edges of the shell, and then pour any remaining white out of the bottom half of the shell -- and if that doesn't get rid of most of the white, you can repeat that yolk transfer a few times. If you end up with one "half" of the shell not being large enough to hold the yolk, just cup your palm and empty the egg into it, carefully cradling the yolk and letting the white of the egg sludge through your fingers. If at any point the yolk breaks and starts to run, don't worry about how much white is left in with it -- just add it to the mixing bowl. A little extra white won't hurt anything here.

If you want, you can also save the egg whites in a sealed container in the fridge for up to 4 days for use in this or other cocktails or baking projects. They'll also keep in the freezer for up to 6 months.

Wednesday, December 2, 2009

recipe: drunken-raisin oatmeal cookies with pecans and tangerine

I'm a food blog junkie, infatuated with foodie recipe sites, and a sucker for slick, high-production-value cookbooks. And I'm here today to tell you: Sometimes the recipe on the back of the brand-name lid really does work best. For example, my favorite pumpkin pie is the kind you make with a can of Libby and the recipe that's printed on the label. (The first year that my family nouveau & I hosted our See We Are Totally Grownups Thanksgiving, we slaughtered a pumpkin and made the pie from scratch. It wasn't as good.) Same goes for oatmeal cookies -- honestly, the Quaker Oats kids know what they're talking about. They've made some cookies in their time. Trust in the label. It wants you to eat delicious cookies.

....Okay, confession: I don't entirely trust in the label. 'Cause, see, the Internet told me that parbaking the pie crust will prevent sogginess and that simmering the pumpkin and cream together will make a richer filling, and the Internet never semi-rarely steers me wrong. I can never just follow a recipe. This is possibly why I started a food-related blog.

In the case of oatmeal cookies, I mostly just add a few little touches for maximum deliciousity. The base recipe creates soft, chewy, comforting oatmeal cookies. With a few little additions, I wind up with something that tastes like home and warm and the holidays: pecans for a buttery crunch, whole wheat flour for nutty richness, cloves and tangerine zest for tastes-like-Christmas, and whiskey for smokiness & extra moisture [and also 'cause dude, most things about the holidays are better when you (or, y'know, your raisins) are a little tipsy].


Drunken-Raisin [Vanishing] Oatmeal Cookies, with Pecans and Tangerine
Adapted from the inside of the Quaker Oats lid. Makes ~3 dozen cookies.


INGREDIENTS

1/2 cup raisins (dried figs would also be awesome, just chop them raisin-sized)
1/4 cup whiskey (or bourbon -- you want something sweet rather than peaty, I used Jack Daniels)

1/2 cup all-purpose flour
1/4 cup whole wheat flour
1/2 tsp baking soda
1/2 tsp ground cinnamon
1/8 tsp ground cloves
1 tangerine (or orange, or clementine, for 1 tsp of zest)

1/2 cup packed brown sugar (light or dark is fine, I like dark)
1/4 cup granulated white sugar (minus a tablespoon if you like less sweet desserts)
1 stick unsalted butter (we're gonna soften it)

1 egg
1 tsp vanilla extract

1 1/2 cups whole oats (regular or quick-cooking)
1/3 cup pecans (we're gonna chop them small & toast them)


METHOD

At least an hour before you start working, measure out your raisins into a ramekin, small bowl, or coffee mug. Add the whiskey and stir. Set aside, and stir whenever it occurs to you that you haven't in awhile. (You could do this the night before, even, if you have way more foresight than I do.) Don't worry, all the alcohol will bake off. No one will get tipsy from the finished cookies.

When the raisins have soaked up some of the whiskey, you're ready to start working. Set out your butter and egg to allow them to warm up a bit.

Chop your pecans to pea-sized-or-smaller chunks, and toast them until fragrant and warm-golden colored. That'll be ~2 minutes in a toaster oven or in a pan on medium heat on the stovetop, ~10 minutes in an oven that's just been turned on and is heating up to 350 (which is what the cookies will bake at), or ~5 minutes in a hot oven. Watch them carefully. If they burn/blacken, start over with fresh pecans. Set aside.

Measure out your dry ingredients (flours, baking soda, cinnamon, and clove) into a medium bowl and whisk to combine. Zest your orange-colored citrus of choice, and if the pieces are more strip-like than granular, chop them fine (a teaspoon is approximately what you get from one tangerine or clementine, or ~1/2 of an orange, if you're not being extremely industrious about zesting). Add the zest to the dry stuff and whisk again to combine.

If you haven't heated up your oven yet, now would be a good time to get that going towards 350.

Measure your sugars into a separate, larger bowl and add your softened butter in chunks. Cream them together using an electric beater on medium for 3 minutes, then add your egg and vanilla. Use a spoon to strain 2 tablespoons of whiskey off of the raisins, and add that to the wet mixture as well. Use that electric beater on medium again for 1 minute to combine.

Add your dry ingredients to the wet ones, and stir by hand to combine. Drain any remaining whiskey off your raisins, and add the raisins to the bowl. Also add the toasted pecan bits and the oats. Stir, again by hand, to combine.

Drop by rounded tablespoon (ping-pong ball sized bits) onto a cookie sheet and bake for 10 to 12 minutes. They'll look a little shiny and underdone in the very middle of their tops, but they'll continue cooking a bit after they come out, so that's okay. Cool for 10 minutes on the pan, then carefully remove them to a wire rack to cool completely. They'll be crumbly while they're still warm, and chewier once they're cool. I'm a chewy-texture fan, so I'd recommend waiting.

If you don't need that many cookies right now, you could refrigerate the dough for an hour or so until it's solid enough to work with, and then mold rounded tablespoons of dough into balls, wrap them in plastic wrap, and freeze in a plastic bag or container for up to a month. (Just let them defrost in the fridge for a few hours before baking, and use the full 12 minutes of baking time to compensate for the dough being chilly going in.)

Store the cookies in an airtight container, and they should last a week. Freshness-wise, anyway. They don't call them "vanishing" for nuthin.


OH HAY, A TIP

If, like I did when I made these, you find yourself without brown sugar but with both white sugar and molasses, you can haz a substitute. White sugar is just brown sugar with the molasses removed. So, to substitute for a half cup of dark brown sugar, use a half cup of white sugar plus 2 to 3 teaspoons of molasses. (I say "2 to 3" because honestly, measuring molasses is an imprecise science. Just get about that much in the mixing bowl, and don't worry about it.)

Tuesday, December 1, 2009

recipe: sugared cranberries

Last winter I went through a phase where playing with melted sugar seemed like a really excellent idea, and through a simultaneous obsession with cranberries. Of course this happened eventually:

sugared cranberries
Sugared cranberries. Most recipes I've seen call for maceration overnight, but I prefer my method of gentle simmering -- it jellifies the inside of the cranberries without sweetening them very much, and once you apply the sugar crystal coating, each berry becomes an individual bite of cranberry sauce: a burst of tart, thick jelly contained by the crisp crunch of sugar shell. And they look gorgeous and festive as a plate garnish or table dressing with a warm & wintery holiday meal. Many thanks to Maria @ MommyMelee for the photo evidence.


Sugared Cranberries

INGREDIENTS

1/3 cup granulated white sugar (for coating)

1/4 cup granulated white sugar (for syrup)
2 tbsp water
1 cup fresh cranberries

1/4 cup additional sugar (for syrup)


METHOD

Set out a layer of parchment paper (or a plastic/silicone cutting board) on a flat work surface. Pour the 1/3 cup of sugar for coating into a medium (like, can-of-soup-sized) bowl, and set it by the paper/board.

Rinse the cranberries, but don't worry about drying them. In a 2-quart saucepan (i.e., smallish, but large enough to hold all of the cranberries in a single layer), stir together the water and 1/4 cup of sugar, and place over very low heat. Like, heat setting 1 or 2 out of 10. You'll want it to just simmer, but never reach a full boil. Stir the sugar occasionally until it's dissolved and just beginning to bubble.

Add the cranberries to the melted sugar, and stir gently to coat. Some (or even most) of the cranberries will split a seam in their skin to let steam out, but so long as they're not starting to gush jelly out into the pan, they're not too hot. If any start bursting completely open, take the pan off the heat for a moment and turn the temperature down.

Cook for about 3 minutes, stirring gently and frequently to keep the cranberries coated with the syrup. When the liquid in the pan begins turning pink, add the extra quarter cup of sugar. Continue stirring gently for another 3 minutes or so. You're looking for all of the sugar to be dissolved and the cranberries to look like they can't take much more heat without bursting.

Turn off the heat, but leave the pot on the warm burner to prevent the syrup from solidifying too much while you're working. With a slotted spoon, fish a scoop of cranberries (<10 or so) out of the pan and wiggle it to drain off some of the syrup. Add the cranberries to the bowl of sugar, and shimmy the sugar around in the bowl to coat them. If any of the cranberries are sticking together, poke them apart with a finger or clean spoon (carefully -- hot sugar can be very hot). Once they're coated with sugar crystals, gently pick the cranberries out (they should be cool enough to touch if you're quick) and place them on the parchment paper/board to cool, dry, and harden.

Coat the remainder of the cranberries in sugar, a scoop at a time. If towards the end of the batch you find the sugar crystals clumping instead of coating the cranberries evenly, just pick out the clumps of syrup and add a couple tablespoons of fresh sugar to the bowl. The sugared cranberries can be eaten/used as garnish as soon as they're cool enough -- maybe after they've been out of the pot for 10 minutes -- but if you want them to last for a day or two, allow them to dry for at least an hour on the sheet.

You can proceed this way through an entire bag of cranberries, using fresh sugar each time -- a 16 oz bag contains about 3 cups, or 3 batches. You want to keep the cranberries in a single layer in the pot, though, so that they cook evenly and thoroughly -- don't be tempted to cook a double or triple batch all at once.

It's best to store the sugared cranberries in an open container in a cool, dry place that's out of the sunlight, which may melt them. Do not store them in the fridge -- the moisture will make them melt for sure. You can seal them in a plastic baggie or container if you wish -- just put a layer of parchment between the cranberries and the plastic. Even so, the sugar coating may begin to melt after a few hours. Should the coating melt, you can reapply it without doing any particular damage to the cranberries -- they won't look as pretty the second time around, is all. They should keep for 2 or 3 days (if you can avoid eating them all, piece by piece, absentmindedly).

If you're the sort of person who hates wasting anything, you could add a few tablespoons of water to the remaining (pretty-in-pink) syrup in the pot, heat it and stir to dissolve, and pour it into a sterilized jar/bottle for use in tea/coffee/cocktails during the holiday season. It shouldn't have much if any flavor from the cranberries, and should last at least a month if you store it in the fridge until it's needed.

Thursday, October 15, 2009

recipe: snickerdoodles

I visited my mother's parents every summer when I was growing up. My Grandma Lou baked every day: loaves of butter bread, cinnamon rolls with walnuts and maple icing, fruit pies, angel food cakes, oatmeal raisin cookies, snickerdoodles. My memories of her bright, busy kitchen are a huge part of why I find baking and baked goods such a comfort.

A good friend of mine, Phil Clippinger, died in a car accident on Saturday, September 26th. (I've had a memorial post in the works for weeks, but haven't been ready to talk publicly about everything yet.) The week after his death, I spent a lot of time baking -- it kept me busy and fed my friends -- but on the morning of his funeral, I found myself with a kinda hilariously Jewish need to bake. The funeral was a huge Catholic mass, with a choir, and kneeling, and billows of incense smoke pouring through the thick slant of sunset that fell over his coffin. It's not like his family was sitting shiva. And it's not like I'm really that Jewish -- only half my family is, on my father's side, and I don't even observe the high holy days unless someone else does the planning. But when I woke up on the morning of Phil's funeral, I had to make something to bring to his family. And snickerdoodles were the most comforting thing I could think of.

This recipe makes ~3 dozen chewy, buttery, cinnamon-spiced cookies, and can easily be doubled if you need to feed everyone.


Snickerdoodles
Adapted, as usual, from smittenkitchen.

INGREDIENTS

1 1/3 cups all-purpose flour (use a full 2 3/4 cups if you're doubling)
1/2 tsp baking soda
1 tsp cream of tartar (If you don't have this, omit the baking soda and use 1 1/2 teaspoons baking powder to substitute for both)
1/8 teaspoon salt

8 tbps (1 stick) unsalted butter, room temperature
3/4 cup white sugar
1 egg, room temperature

1/8 cup sugar
2 tsp ground cinnamon

METHOD

A half hour before you get started, set out your butter and egg to allow them to approach room temperature.

When you're ready to start, preheat your oven to 400° F, and prepare a cookie sheet with butter, parchment paper, or a silicone baking mat if you're into that kind of thing. (I've got a nonstick sheet that things come off of pretty well all by itself -- I've found that greasing it just makes the bottoms of cookies burn, and putting down parchment or a silicone mat prevents cookies from getting good & crispy on the bottom, so I leave mine alone.)

Measure out your dry ingredients (flour, baking soda, cream of tartar, and salt) and whisk them to combine.

In a larger bowl, measure out your butter and sugar. Beat them with an electric mixer on medium speed for 2 minutes, or until they've begun to lighten in color and increase in volume (this is called creaming and it's how air gets into the batter, and thus what gives cookies their awesome chewy-tender texture -- if you creamed the mixture for a couple minutes more, you'd end up with a more airy, cakelike texture in your cookies). Scrape down the bowl then add your egg, and beat the mixture on low until the egg is fully incorporated (1 minute or so).

Pour your dry mixture into your wet mixture and stir manually until everything's incorporated. If the dough seems too sticky to work with, add an extra tablespoon or two of flour.

Combine your cinnamon and 1/8th cup of sugar in a small dish, bowl, or ramekin -- something you'll be able to roll balls of dough around in. Stir to combine.

Use a table spoon (like, a thing you'd eat with) to scoop out a bit of dough -- think something maybe 1 inch to 1.5 inches in diameter, or a bit smaller than a ping pong ball. Roll it between your palms gently to shape it into a ball, and then drop it into the cinnamon sugar mixture. Roll it around to coat it with awesome, and then place it on the baking sheet. Flatten it into a disc maybe half an inch thick and ~2.5 inches in diameter. Repeat with a bunch more cookies! They shouldn't spread too much, so you can place them ~2 inches apart or so on the sheet.

Pop the sheet in the oven and bake for 8-10 minutes (or until ~1 minute after your kitchen starts to smell like awesome, or until the cookies have puffed up and then deflated, or until poking one gently on the top yields slightly springy resistance). Allow the sheet to cool for ~5 minutes once it's out of the oven, and then transfer the cookies to a cooling rack until they're just cool enough to serve.

To mix ahead: This dough freezes better if you don't coat it in cinnamon sugar first (the sugar coating may melt when the cookies defrost). So if you're mixing ahead, just roll the dough into balls and freeze them: Either wrap them in plastic so they aren't touching and seal them in a baggie/container, or freeze them on a sheet pan for ~1 hour before tossing them in a baggie/container. Defrost them in your fridge for ~1 hour, roll them in cinnamon sugar, and bake more or less as usual (you might need to add a minute or so to the cooking time).

Monday, October 5, 2009

recipe: chocolate chip pecan brown-butter cookies

These cookies were inspired by a brown-butter cookie that Maria (MommyMelee) makes, my personal quest for the Ultimate chocolate chip cookie, and a random craving for pecans. They bake up thick and soft, with a crisp-crunchy edge and a nutty richness from the pecans and browned butter.

For anyone who's never done it, browning butter is magical, and something I think I want to do for all my recipes that call for melted butter from now on. Similar to how toasting nuts or searing meats brings out their full flavors, gently cooking butter before using it in a recipe deepens the taste and color of the final product. The outcome in these cookies is a decadent and craveable comfort food.

Chocolate Chip Pecan Brown-Butter Cookies
Adapted from Deb @ smittenkitchen, who adapted it from AllRecipes.com.

INGREDIENTS

3/4 cup (a stick and a half) unsalted butter

2 cups all-purpose flour
1/2 teaspoon baking soda
1/2 teaspoon salt

1 cup packed dark brown sugar (light would be fine too)
1/2 cup white sugar
1 tablespoon vanilla extract
1 egg
1 egg yolk

2 cups semisweet chocolate chips
1/2 cup pecans, finely chopped

METHOD

First, get your butter browning: Cut your butter in chunks into a small, shallow pan, and set it over low heat. Really low. Just above "warm", and certainly not as high as medium. The idea here is to just toast the butter -- you want it to melt & separate, and then get just hot enough so that all the milk solid bits sink to the bottom, and then cook just long enough so that those milk bits caramelize, becoming fragrant and turning a lovely warm shade of golden brown. The whole process should take maybe 5 to 10 minutes, and your butter should bubble but never go above a simmer. Stir it frequently to keep all the milk bits from sticking to the sides or bottom of the pan. When the color has deepened and the butter smells like maybe you want to stick your face in it, take the pan off the heat and set it aside.

Meanwhile, or afterwards if you don't like multitasking, preheat your oven to 325°F. Take your chopped pecans (I like them to be pretty much minced with a few slightly larger chunks 'cause I don't like too much crunchy texture in my cookies, but you can adjust to taste -- I'd say anything up to pea-sized chunks would work), spread them onto a baking sheet, and pop them in the warming oven for 5-10 minutes or until they're fragrant and have slightly deepened in color. Set them aside.

Measure out your dry ingredients (flour, baking soda, and salt) and whisk them to combine.

In a separate, larger bowl, measure out your sugars and add in the browned butter. Beat them together with an electric mixer for about 2 minutes on medium. You're looking for the mixture to increase a bit in volume and lighten a bit in color. Add the vanilla and eggs, and beat for about a minute until the mixture is creamy and well incorporated.

Put down the beater, and mix in the dry ingredients by hand (well, by spoon/spatula, unless you really want to use your hands). Then gently fold in the chocolate chips and the toasted pecans. The dough will be soft and sticky, and at this point, you could refrigerate it for up to 24 hours before baking. (David Leite, who I trust in all things, researched & recommends refrigerating cookie dough for about this long to allow everything to combine & settle into itself. Guys, I don't have 24 hours' worth of cookie foresight. If you happen to, though, let me know how the refrigeration thing works for you.) If you find the dough too sticky to work with, cover the bowl with foil/plastic wrap/a large plate and pop it in the fridge for 10-20 minutes.

Next, use a spoon to scoop up a ping-pong ball sized or slightly smaller bit of dough, and roll it gently between your palms to form a ball. Drop it on a cookie sheet (greased or covered with parchment paper if you like) and flatten it out a little so that it'll cook more evenly. Leaving about 3 inches between cookies, fill your cookie sheet and bake for 8-12 minutes, depending on the size of the cookies and whether the dough has been chilled. (You're looking for the cookies to puff up and then deflate a bit -- an undone cookie will yield easily if you gently poke the top of it, and leave a sort of darkened, bruised-looking indentation, and will feel very soft. Gently poking the top of a done cookie will offer slight, springy resistance, and won't leave an indentation. Erm, relatedly, please use caution if you're going to go reaching into ovens to poke at cookies. Honestly, erring on the side of underdone is okay. They'll continue to cook a bit once they're out of the oven anyway.)

Once they're out, let the cookies cool for a couple minutes on the baking sheet, then remove them to a wire rack to finish cooling enough to shove in your mouth serve.

If you're going to put another sheet of cookies in to bake immediately, wipe down your cookie sheet with a clean, damp cloth or paper towel first (this gets the crud off the sheet and also cools it down enough so that it won't par-bake the new round of dough before it even hits the oven).

If you'd like, you could freeze the dough for baking later -- I just roll the dough into cookie-sized balls and wrap them in plastic wrap so that none of them are touching, then stick the whole caboodle into a ziplock bag or Tupperware and shove it in the freezer. Alternately, if you have the space in your freezer, you could place the dough balls on a baking sheet and let them harden in the freezer for an hour or so, after which they shouldn't stick to each other and could be placed directly into a ziplock bag/Tupperware. They'll keep in there for at least a week. Just remember to either let them defrost in the fridge for a few hours before baking, or to adjust your baking time (maybe 12-18 minutes) if you're doing them straight from the freezer.

Saturday, October 3, 2009

recipe: banana-pecan-date bread

Baking is one of my coping mechanisms. It keeps me busy, and then I get to eat/feed other people comfort food. My project for the evening was a riff on my friend's family banana nut bread recipe. The dates add a tangy sort of contrast to this sweet, homey quick bread, and the pecans are sweeter than the traditionally used walnuts.

The only real secret to any quick bread recipe (y'know, anything you can put in a muffin tin/get to rise without yeast) is to not work the batter much at all after you add in the flour. You really only need to get the flour wet -- mixing it too hard will create too much gluten and make your bread/muffins tough. And nobody likes tough muffins.

Banana-Pecan-Date Bread

INGREDIENTS

1 1/2 cups all-purpose flour
1/2 cup whole wheat flour
1 tsp baking powder
1/4 tsp salt

1/2 cup white sugar
1/2 cup brown sugar
1 stick (1/2 cup) butter, melted
2 eggs
3 ripe bananas, sliced
1 tbsp vanilla

1/2 cup pecans, finely chopped
1/3 cup dried dates, pitted and chopped small

METHOD

Preheat your oven to 350 degrees F. Spread your pecan bits out in a pan and stick them in the oven until they begin to get fragrant -- 5 to 10 minutes, depending on how fast your oven heats up. (You want them to get a little deeper in color, but be careful not to burn them!)

Meanwhile, butter & flour a bread loaf pan. Yes, even if it's nonstick!

Measure out your dry ingredients (flours, baking powder, salt) into a bowl and combine them by stirring with a whisk. (You could sift them together if you're more motivated than I am.)

In a separate bowl, combine the butter and sugars. Hit 'em with an electric beater on low-to-medium speed for ~2 minutes, or until the mixture increases in volume and lightens in color a bit. Add the eggs, vanilla, and bananas, and beat for another minute or so on low-to-medium, or until the bananas are pretty well mashed up and mixed in -- smallish, pea-sized chunks are okay, but you don't want pieces much larger than that.

Now, my friends, it is time for the dry ingredients, so put that mixer down. Gently stir your dry mixture into your wet mixture, juuust until it's incorporated. A couple dry spots are okay, 'cause after you gently stir in the toasted pecan bits and the chopped dates, you're gonna leave the batter alone for five whole minutes. Five! Just set the bowl down and walk away. (I know this because Alton Brown knows this.) While you're checking your Twitter page, the flour will be busy soaking up some extra moisture without creating any of that nasty tough-muffin gluten.

When you come back, pour the batter into the prepared pan (you'll notice that most any flour pockets will have disappeared, and the batter will have some air pockets in it -- this is a good thing) and pop that sucker into the oven! It'll take an hour or so to bake -- check it at 60 minutes, and leave it for another 5-10 if it's not a deep golden brown yet. Let it cool in the pan for a few minutes (to let it finish cooking & solidify a bit), then turn it out onto a cooling rack and let it sit for another few minutes (for the same reason) before slicing and devouring.

Wednesday, September 9, 2009

recipe: silver (pink) gin fizz

Darrell Autrey, Concentrics Intoxicologist and Magician-at-Large,* likes making people drunk happy. Okay, happy and probably a little bit drunk. Especially if you're a friend of his, which I am, which is both terrific and terrible, gastronomically speaking. The former because he teaches his friends how to make delicious, classic cocktails, and the latter because we then drink delicious, classic cocktails all the time and get all drank & chubby.

My current cocktail obsessions all involve gin -- Bee's Knees, Aviations, French 75s, and, perhaps the most kitschy and shiny, Silver Gin Fizzes. A Silver Gin Fizz is a slightly sweet gin + citrus + soda cocktail that boasts a slight creaminess and a gorgeous foam head thanks to the inclusion of a raw egg white in the cocktail shaker -- aaaand I'm sure I just lost some of you. But it's not gross, or slimy, or egg-flavored, and I haven't caught salmonella from one yet. (Though I'm pretty sure that the first time I saw a drink made with an egg white, the part of my brain that's still stuck in college with my roommate Juliana screamed "WATCH OUT, THE DRINK HAS CHICKEN".) See, look how pretty they are:

Silver (Blackberry) Gin Fizz! Photo by Jeremy of dreamthrum.com
(Photo by Jeremy of dreamthrum.com!)


This particular Silver Gin Fizz got its pretty-in-pink color from the blackberry-infused gin that our crafty & wondermous friend Melissa made with a bottle of mild, lovely New Amsterdam gin, about half as many/much fresh blackberries by volume, and a week or so of patience. She didn't add any sugar so the gin is tart and berrylike, which plays well with the lemon in the Fizz -- but plain ol' gin would absolutely work just as well.

Silver (Pink) Gin Fizz

INGREDIENTS


1.5 oz. gin
1 oz. fresh-squeezed lemon juice
1 oz. simple syrup
1 egg white
Club soda to fill
Bit of lemon peel (for the zest, and for a garnish if you're fancy)

METHOD

1) Prepare a champagne flute (or other tall, skinny glass) by rubbing a piece of lemon peel, yellow side down, across the rim.

2) Fill a cocktail shaker halfway with ice. Measure out your gin, lemon juice, simple syrup, and egg white into the shaker. Cover the shaker, and do a little dance using the shaker as a stand-in for your handheld percussive instrument of choice. Strain the contents into the prepared glass, and gently top the mixture off with club soda. Should you happen to have fancy knife skills, garnish the foam with a curl of lemon peel.

3) Get drank in style!


*Due to irreconcilable differences with their Midtown landlord, Concentrics has temporarily closed Trois (Darrell's most recent bartending ground) pending the discovery of a new location. If you're visiting a different Concentrics location in the meanwhile and find a bartender in a bow tie, ask him for something fabulous and tip him just as fabulously!

Tuesday, August 25, 2009

recipe: red velvet cake

I realized last week, not quite simultaneously, that a) I had never baked anything for my roommate's birthday, b) I only had two kinds of flour in my cupboard (clearly not enough flours), and c) I wanted to make something rather more technically ambitious than chocolate chip cookies (even the kind that contain bacon. really they're simple, go make them.)

So I asked Josh what he wanted, and he mentioned red velvet cake. Which, chance had it, one of my friends had done a version of for a friend's wedding shower just a couple weeks back. Of course, Steph being Steph, she carved several layers of the cake into a rough semi-oblique and then colored and hot-knifed and cross-hatched some frosting to make the thing look perhaps uncannily like a ham:


I do not love my friends this much. Sorry, friends, but the only pork involved in my desserts will be internal.

But I'd never made a layer cake from scratch, so I manned up, bought some cake flour, and made it go. The process was a bit time consuming for me, personally, and overall I felt like the cakey result wasn't particularly better than a store-bought cake. (I suppose even matching store-bought is sort of a feat, though, so I'm proud of me.) The frosting I made, however -- a vanilla'd cream cheese deal -- was completely worth making from scratch. Next time I'll probably buy a box of cakemix, but from now on I might make from-scratch frosting all the time (regardless of whether there's a cake involved).

Now, okay, here's The Thing with the frosting recipe that I've just talked up. I got it from Cook's Illustrated, which puts enough time & effort into testing and writing their recipes that they (quite rightfully!) copyright them. And while I changed the ingredient ratios, I really can't say that I adapted it enough to let myself publish it here. So, I'll give you a link to the recipe and the directions for a very similar recipe from a free site, but if you want the exact thing, you'll have to go sign up at Cook's Illustrated Dot Com. You can sign up for a 14-day free trial -- for which you DO have to enter credit card information, but which you CAN cancel before the trial period ends, thus avoiding any charges. Though if you've got a spare $34.95 sitting around for a year's membership to the site, I'd say that'd be an excellent, well-spent $34.95. Really. The folks over there do brilliant, pertinent things with food and explain everything painstakingly, which you may have noticed is a schtick that I enjoy.


Red Velvet Cake with Vanilla Cream Cheese Frosting
From 28 oz. Wine Glass and Joy of Baking, and then also Cook's Illustrated and Simply Recipes

INGREDIENTS

Cake
2.5 c. cake flour (finer grain than all-purpose! very worthwhile)
1 tsp baking powder
1 tsp salt

2 Tbsp. cocoa powder
1 oz. red food coloring
1 oz. water/booze (rum, vodka, whisky, Kahlua, blackberry gin, etc.)

1.5 c. white sugar
1/2 c. (i.e., 1 stick) unsalted butter, room temperature
2 eggs, room temperature
1 tsp. vanilla extract

1 tsp. white vinegar (DUDE I KNOW)
1 tsp baking soda

1 c. (8 oz.) buttermilk

Frosting
1/2 c. (1 stick) unsalted butter, room temperature
8 oz. (1 package) cream cheese, room temperature
1/2 tsp. vanilla extract
Scrapings from 1 or even 2 vanilla beans
2-3 c. powdered sugar

METHOD

For the cake, set out your butter and eggs to let them warm to room temperature. Butter & flour either a 9x13" pan (what I used) or 2 9" round pans or even 3 8" rounds.

Measure your cake flour, baking powder, and salt into a medium bowl and whisk to combine. If you were very motivated/had a better sifter than me, you could sift them together instead.

In a small bowl/ramekin, measure out your cocoa powder and pour in the vanilla and the red food coloring. Then take the empty food coloring bottle and fill it up with either water or a clear/red/brown-colored liquor. (I used a blackberry gin that my friend Melissa made, pretty much entirely for the color, but I think whisky, Kahlua, rum, or plain ol' vodka would also do nicely. This'll get all the remaining food dye out of the bottle, and possibly will add a bit of bonus flavoring if you've used good booze.) Add the refilled bottle contents to the bowl and stir until smooth and lump-free.

Now might be a good time to get your oven preheating to 350 F.

In a large bowl, beat your butter and sugar until they're fluffy (about 3 minutes with an electric hand mixer on medium-high). Beat in one egg until completely incorporated, and then give your second egg the same treatment. (You're scraping down the sides of the bowl after each addition, yes? Good.) Next, beat in the vanilla-cocoa-coloring mixture. Take a moment to cackle maniacally after all those beatings, if desired. (It'll be very appropriate 'cause the mixture will be bright, bloody red.)

Pour 1/3 of your dry ingredient mixture into the wet ingredient mixture and stir to combine. (I don't like using electric beaters once the flour is involved 'cause doing so can make the glutens get all stiff & yicky.) Then stir in half the buttermilk, then 1/3 of the dry ingredients, then the last of the buttermilk, then the last of the dry stuff.

In a small bowl/ramekin, pour the vinegar over the baking soda and stir. Will be fizzy. Quickly fold it into the cake batter.

Pour your batter into your pan(s) and bake for 25+ minutes... might take a bit less for 8-inch pans or a bit more for a 9x13-incher. When it's done, a wooden toothpick/skewer should come out clean but for a crumb or two. (I get nervous about sheet cake and let my 9x13 go a little too long, maybe 31 minutes. It ended up a little dry. For the larger pan sizes, toothpick check at 25 minutes and estimate from there!)

Once the cake(s) are out of the oven, let them cool in the pan(s) until said pan(s) are cool enough to touch. Then turn the cake(s) out onto a cooling rack. Cake needs to cool completely before you frost it, and will do even better if it's fridge-cold. I let mine sit until it was room temperature, then cut it in half the short way (producing 2 9x6.5" cakes), wrapped the halves in parchment paper, and let them chill in the fridge for maybe half an hour.

While you're waiting for them to cool, set out your frosting-recipe butter and cream cheese to allow them to soften.

When your cakes are about ready to frost, make the frosting. First, scrape your vanilla bean(s): take a bean, cut it in half the short way, and then slice each half open the long way. (It's even easier to scrape, though might require knife skill, if you don't bisect them the long way, but only slit them open.) Check out all those sticky little black pod/seed thingies! Now stop staring and use the dull/nonoperative edge of a knife blade to gently scrape the black stuff out of the pod. (Reserve the pod, it's made of delicious! Chop it coarsely and either put it in a bag of sugar for vanilla-flavored sugar, or in a small container with enough vodka to cover for vanilla extract.)

Put your butter, cream cheese, vanilla extract, and any vanilla bean scrapings you're using in a medium-sized bowl and use your electric beater to beat them smooth (2-3 minutes?). Add powdered sugar in small amounts (maybe stir a little before beating each time to avoid sugar explosions) until you've got a volume, consistency, and sweetness level that seems awesome.

To apply the frosting, okay I'm inexperienced with this so other tutorials will be more helpful. But basically, you want to do this in two steps.

First, apply a thin layer of frosting to each section of cake as you stack them. This layer will be messy and full of crumbs, and is called a crumb coat, and will prevent your outer layer of frosting from being messy and full of crumbs. Once the crumb coat is on there, sticking the whole cake in the freezer for awhile will help it set! It's ready for the next step when the frosting is no longer tacky to the touch (maybe 30 minutes).

Second, apply your outer layer of frosting. Whee!

As long as it's tightly covered, this cake seems to do okay without refrigeration for a few days, despite the dairy in the frosting. Covering tightly and refrigerating will let it keep for a week or so, assuming that you don't have people like me around who will pretend that red velvet cake is part of a nutritious breakfast. (With the cream cheese, it's like a bagel, right?? Wait those aren't healthy either, crap.)

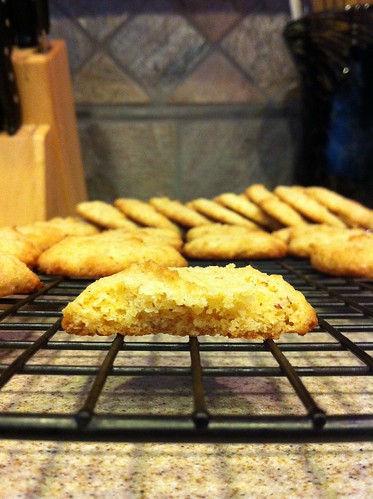
Sunday, August 9, 2009

recipe: orange-chocolate-raspberry yogurt cake

The whole thing where the word "cake" doubles as a synonym for "simple" makes me feel like a complete lamer sometimes. 'Cause folks, sometimes cake is hard. There are electric beaters involved, and patience and delicacy are as necessary as those eggs that oh-hell-you-didn't-beat-enough, and after it comes out of the oven people expect you to do something fancy with it. I secretly despise complicated recipes and making things pretty -- my favorite desserts are hearthy, homey things that look a mess and taste ethereal, like the music nibblins of the spheres.

This loaf cake comes together in two bowls, no electric gadgets necessary, and the "decoration" involves stirring and then pouring. And having leftovers means that you don't have to fix breakfast.

Orange-Chocolate-Raspberry [aka Anything] Yogurt Cake
Adapted from smitten kitchen, who adapted it loosely from Ina Garten

INGREDIENTS

Cake
1 1/2 cups all-purpose flour
2 teaspoons baking powder
1/2 teaspoon salt (coarse/kosher/sea salt always preferred)

1 c. plain yogurt (I used nonfat, lowfat might be better)
3/4 c. white sugar
3 eggs (extra-large preferred)
2 teaspoons grated orange zest (~1 orange)
1/2 teaspoon vanilla extract
1/3 cup vegetable oil

1/2 c. fresh raspberries
1 tbsp additional flour
1 c. chocolate chips

Glaze
1 orange-worth of fresh-squeezed juice (~1/3 c.)
1 tbsp sugar

METHOD

Grease and flour a loaf pan (8 1/2 by 4 1/4 by 2 1/2-inch if you've got it) -- yes even if it's nonstick. (The way I do this is: Take stick of butter. Rub across bottom and sides of pan to coat lightly. Put down stick of butter. Use fingers to spread the applied butter evenly around the surfaces and into the corners. Wipe off hands. Get a good couple pinches of flour and sprinkle them around the pan, probably working over the sink. Tap & turn the pan to coat the butter evenly with the flour, and then tip extra flour out of the pan. Then: TADA, your loaf will release, well, like buttah.)

Get your oven preheating to 350°F!

Measure your flour, baking powder, and salt into a bowl and whisk to combine. You could also sift them together if you were feeling less lazy than me.

In a second, larger bowl, whisk your yogurt, sugar, eggs, orange zest, vanilla, and oil together until smooth.

Whisk the dry ingredients into the wet ingredients in maybe 4 small batches. Once smooth, stir in the chocolate chips.

Toss the raspberries with the extra tablespoon of flour (so they'll bleed less!) and then gently-gently fold them into the batter. Pour the batter into the prepared pan and bake for ~50 minutes... this cake will dry out fairly easily, especially if you've used nonfat yogurt, and it won't brown very much, so start checking at ~45 minutes and probably don't let it go longer than 60. A toothpick or skewer inserted into the middle should come out pretty clean when it's done, but if you bake by sight like I do, you're looking for a light golden color, nothing deeper.

Meanwhile, just barely simmer the orange juice and extra tablespoon of sugar in the smallest saucepan you ever did own, until the sugar is dissolved and the mixture is clear. Set aside.

Let the cake cool off for 10 minutes after it comes out of the oven, and then turn it out onto a cooling rack. If you want to make your cleanup process easier, set the rack on top of a cutting board, baking sheet, or strip of wax paper/tin foil/plastic wrap. Slowly spoon the warm glaze over the top of the cake -- it'll be runny, so a gentle drizzle is about the right speed. (If you're feeling industrious, you can use a toothpick/skewer to poke a few dozen holes in the top of the cake to give the glaze places to go.) You could alternatively reserve the glaze and drizzle it over individual servings of cake just before passing them around.

I think this cake is terrific warm, but it's just as nice once it's cool, and possibly even better once it's been chilled. Which you should always do with baked goods that contain fruit if you want to store them for more than a day.

You could put just about anything into this cake... next time, I'm thinking I'll try chopped strawberries instead of the chocolate chips & raspberries, and lime zest & juice instead of orange. But yes. Just use 1.5 cups of Delicious Stuff, and some kind of citrus zest & juice. And up to an extra 1/4 cup of sugar if your Delicious Stuff is a sorta tart fruit. Tell me what you do and how it came out! And if you take pictures, send them to me and I'll link and/or post them.